How to lay a small concrete slab
Laying a concrete slab is not the easiest of jobs. Depending on the scope of the work, it can take less than a day to lay a very small slab. But if you’re building a driveway or a patio, the work could stretch out to a few days or weeks even, depending on how large the property is. It is back-breaking, and the process takes months and sometimes, even years of experience, to perfect.
So how do you lay a concrete slab? Check out Versatile Concrete’s article below to find out how.
Essential materials
The one indispensable material you’ll need to make a slab of concrete is, of course, bags of concrete mix. Contractors and homeowners buy these bags from the local hardware, as well as from suppliers online. Concrete mixes are usually packaged in 20 kg bags, and labourers only need to add water to be able to use them right away. Keep in mind, though, that you’ll need to use clean water for mixing.
Other essential materials also include forming timber, wood stakes or pegs, twine, and some galvanized nails. Last but not least, you’ll need some all-purpose gravel that will serve as its base.
Tools and equipment
Here are the things labourers use to mix, pour, and finish concrete. But safety is of the utmost importance, so a pair of safety glasses, gloves, and breathing protection (such as an N95 mask) are necessary before you start working. Wear protective clothing and work boots, too.
To mix the concrete manually, the labourers will need to pour the whole bag of concrete mix on a wheelbarrow. The mixture will then be combined using a shovel or a mixing hoe. For large-scale jobs, on the other hand, a large concrete mixer will be needed.
Other essential tools and equipment include a spade, rake, steel trowel, wooden float, and jointing trowel. An edging trowel, a mattock, a magnesium float, and a screed will also be used. You’ll need a mason’s level and a tape measure to keep things straight, true, and accurate. Make sure that you have your hammer, a carpenters’ square, and a circular saw or jigsaw before you start. A rip-cut saw will also do if you don’t own a jigsaw or a circular saw.
Lastly, make sure that you have some cleaning materials ready to get rid of any dirt and debris on the jobsite.
Laying a Concrete Slab
Once all the essential materials, tools, and equipment are on hand, the work of laying a concrete slab can finally commence.
1. Pouring a concrete slab starts by marking its location. Using a tape measure, you will need to measure the location of the slab. Perpendicular lines are measured using a framing square.
2. Using a regular rip-cut saw or a power saw, cut some timber for the formwork, following the measurements of the slab location. Lay them down on the work location, and nail the edges together to form your timbering
3. Set the timbering on your desired location, and mark the edge with a shovel. The mark will be used to dig the depth of the concrete slab.
4. Remove the timbering and excavate the slab area, making sure to dig an extra five centimeters for the road base.
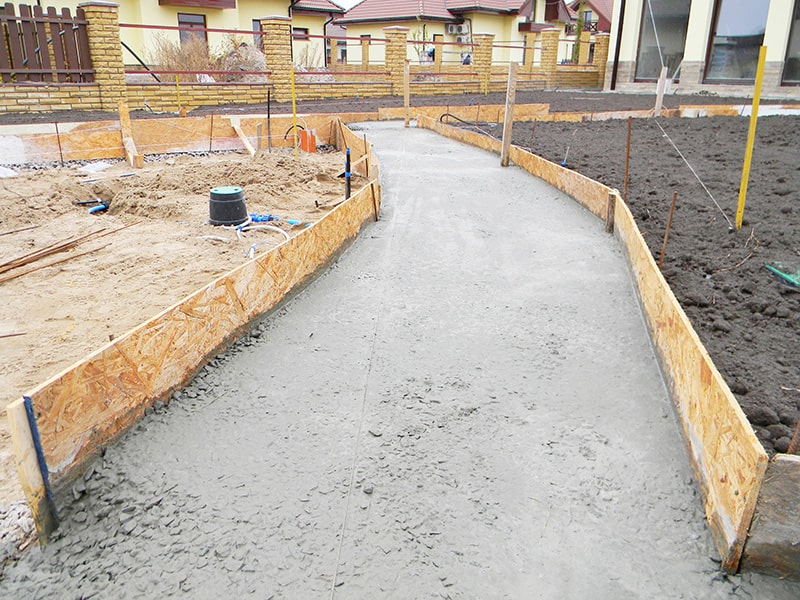
5. Now, lay the timbering again on the slab location. Use a mason’s level to make sure that the ground is, well… level. Make sure that the timbering stays in place by filling its sides and hammering wood stakes outside it. Make sure that the wood stakes have an interval of about a hundred centimeters to ensure that the timbering doesn’t move around.
6. Pour some all-purpose gravel onto the slab area, making sure that it reaches a height of around six to seven centimeters. Use a rake to make sure that the gravel is distributed on the bed evenly, and level it until its thickness only reaches up to about five centimeters.
7. Use a wheelbarrow to mix the concrete, making sure that it doesn’t overflow. Be precise and pour 2.5 litres of water for each bag of concrete you use. Do not put excess water as it can ruin your concrete mix. Mix everything using a shovel.
8. Using a bucket or a hose, soak the slab’s area with water. This helps reduce moisture loss once you start working. Now, pour some concrete against the inner edge of the timbering, adding more as you go. Use a shovel to make sure that concrete fills the edges and corners of the timbering.
9. Make sure that you fill it into the top of the timbering. Try to get rid of air bubbles that can mar the slab’s surface by tapping them with a shovel. Once the timbering is filled completely, make sure that the surface is flat. You can do this by using a tool called a screed. Repeat the process until you are sure that the concrete slab is 100% flat. If you see any uneven sections, simply fill them in with additional concrete.
10. It is completely normal for water to appear on the surface of the concrete slab once you’re done. Don’t fret and just wait for it to evaporate before working again. Once the moisture disappears, tap the concrete slab with a trowel to ensure a smoother and more flawless finish.
11. Tap the slab’s edges using a trowel to make sure that it is completely compact. Use a tool called a jointing trowel applied as far as 150 centimeters each for each section to make sure that cracking doesn’t occur (and if it does, it is kept to a minimum).
12. Now on to curing time. Gently spray your finished work with water using a hose. Note that this is an essential process, and you will need to do this once in the morning and once in the afternoon for the next seven days. This will ensure that the material doesn’t disintegrate easily.
13. Remove the timbering after exactly 24 hours. But you can’t use the slab just yet, so make sure that your children and pets won’t tread on it while it cures. You can walk on it after three days, but make sure to keep things light. Wait for another seven days before it can handle heavy foot traffic or loads.